# Modeling the automation
Now for the easy part: telling Prefix what to do with the elements you've just selected. If all went well, after exiting the extension using "Save & Quit" you should see something that looks like the following back in the Studio:
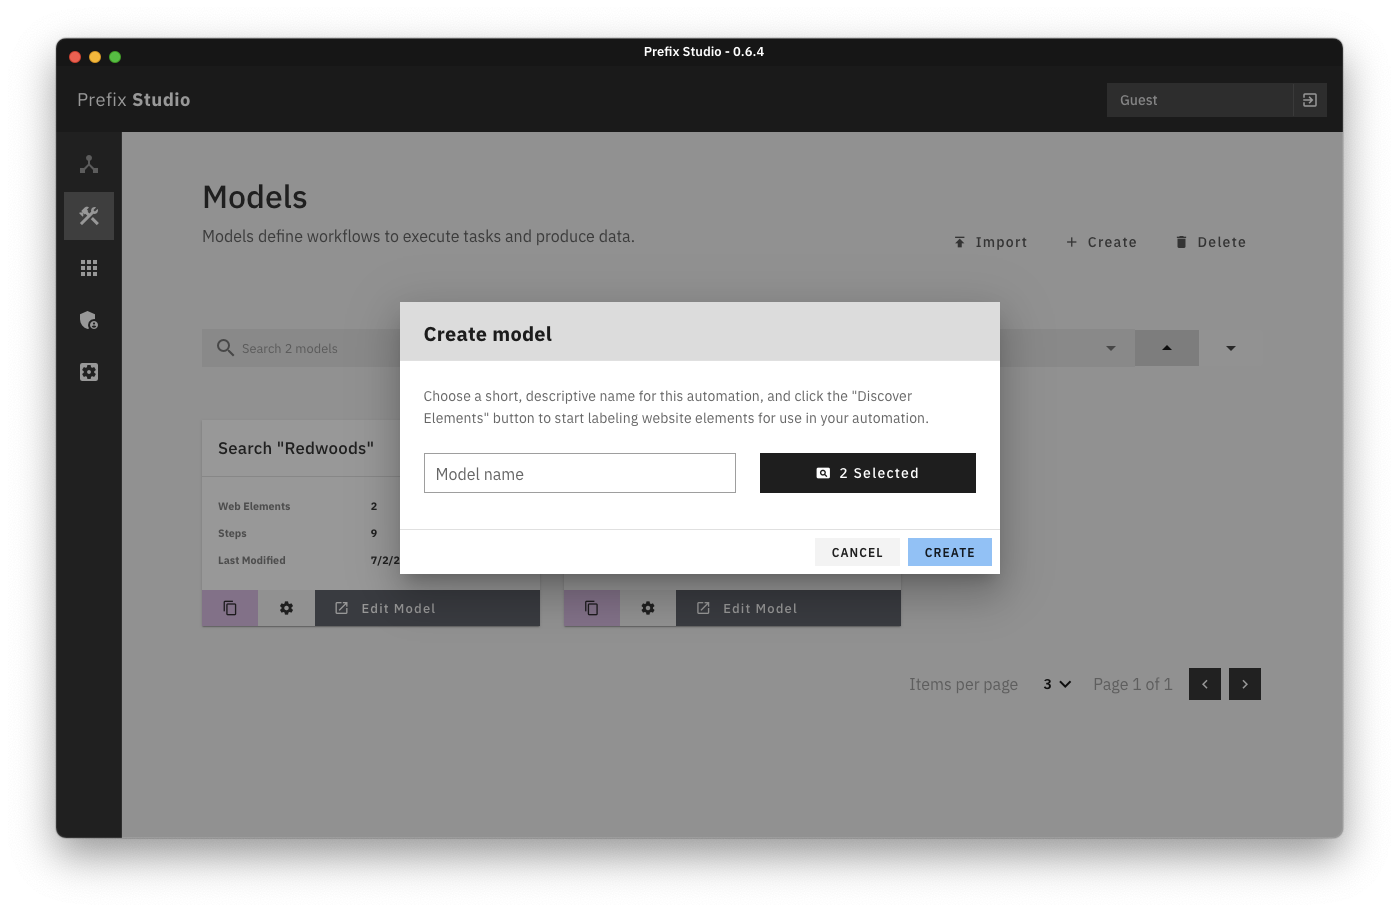
Hit "Create" to get started building the automation model. Don't worry if you think you've forgotten to label some web elements– you can always go back to add new elements to your model if you think of new ideas/automations you want to try out.
Let's briefly clarify exactly what automation we want to build. Our automation will go to google, search for "Redwoods", and navigate and wait for a couple seconds on each of the first 3 search results. Keeping this in mind, we can look for the blocks we need on the left side of the model designer. Namely, we'll need:
- Open URL (to go to http://www.google.com)
- Fill Field (to type Redwoods in the search bar)
- Hit Enter (to submit our search)
- Loop (to loop through the first 3 search results)
- Click Once (to click each search result title in the datagroup element)
- Wait Time (to wait a couple seconds [2000 ms] for each page we land on to load)
- Go Back (to go back to the search results page and click the next one)
Every automation model should start with Open Browser and end with Close Browser. These are provided by default. Here's what this particular model will look like:
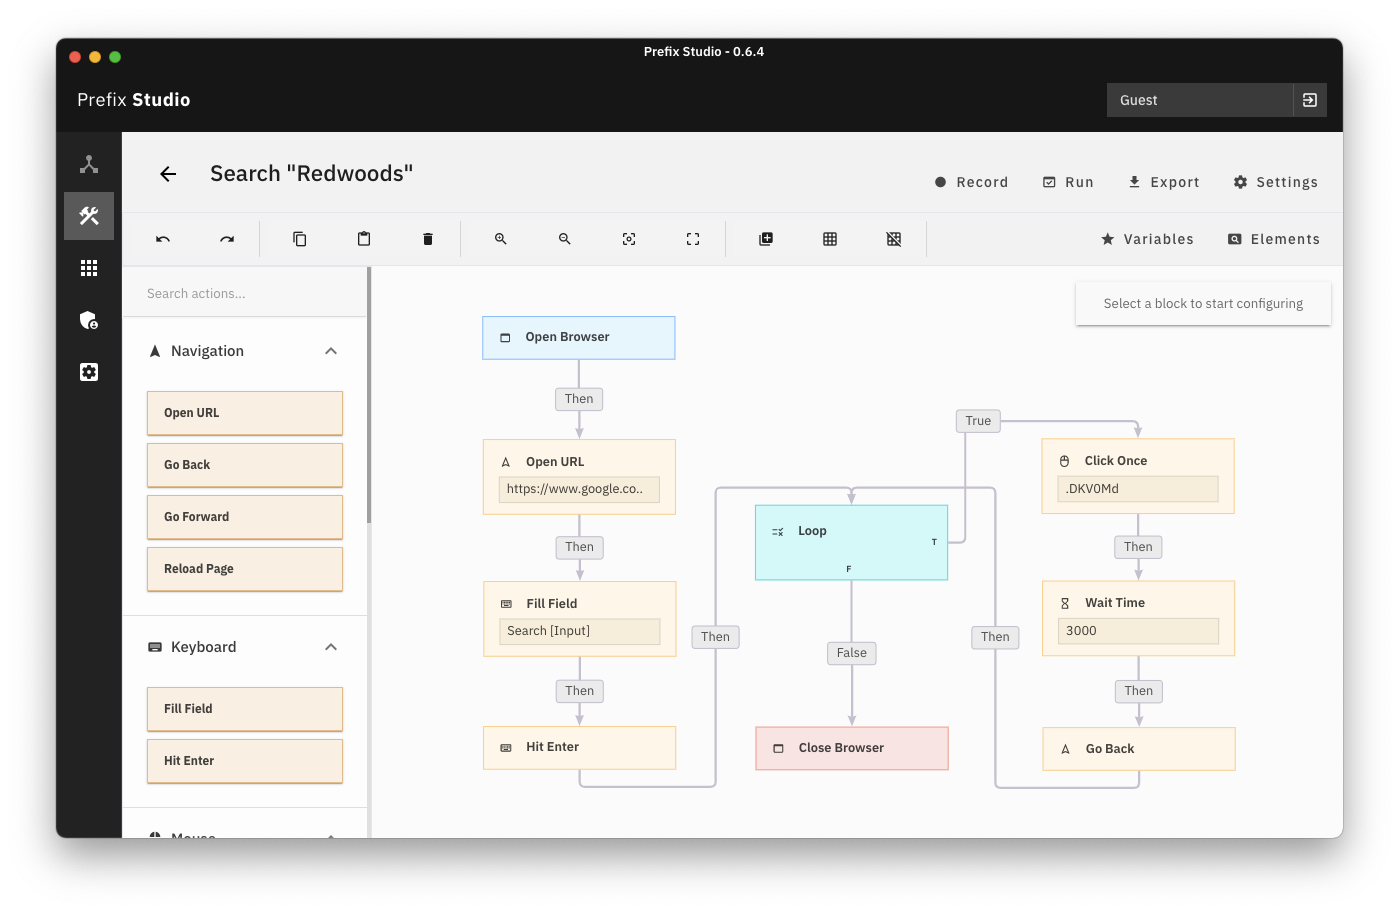
Most automations will be simple sequences of action blocks strung one after the other, but as we need to loop through 3 of every visible search result on Google here, we use a "Loop" block.
Action blocks first appear as grey when you drag them into the editor. To change this, connect them to any block connected to the "Open Browser" step, and enter in any required info on the sidebar on the right that appears when you select the block. Data you enter in the sidebar will be automatically saved when you unselect by clicking anywhere on the canvas.
The easiest way to learn how to use the model designer is to just get started building and running automations as you go. To see what an automation looks like given a valid flow chart, hit the Run button on the top right, and then wait for the browser to load. If your automation appears stuck, or is not working as expected, close out of the browser, and try redesigning your model flow chart.
If you ever need to label more elements, click the black Discover Elements button on the sidebar in any Click Once or Fill Field blocks. Remember to close out using the Save and quit button in the extension when you're done adding elements.
Depending on your application, models can become quite large. We recommend organizing groups of action blocks for particular user flows (logging in, navigating pages, etc.) into columns, for increased legibility.